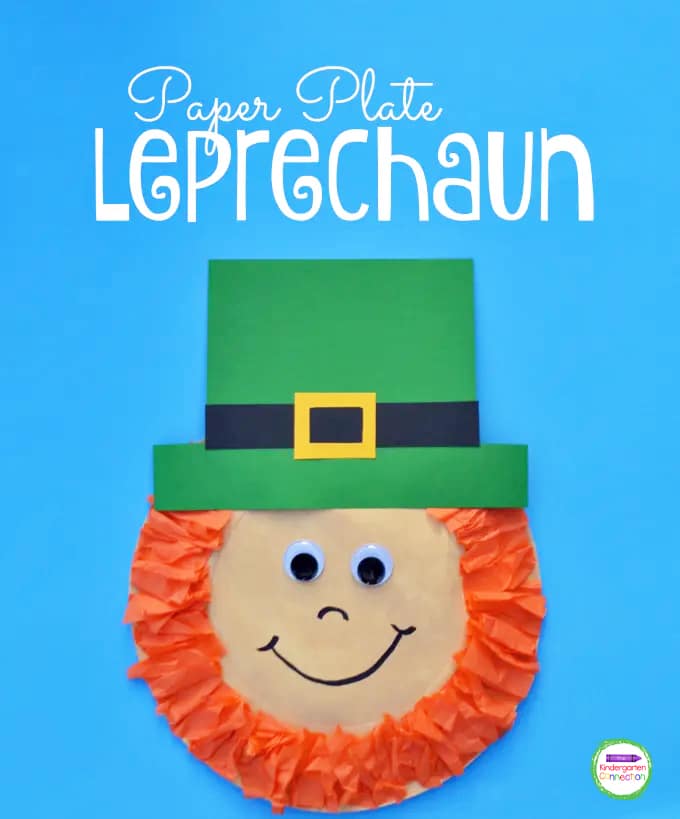
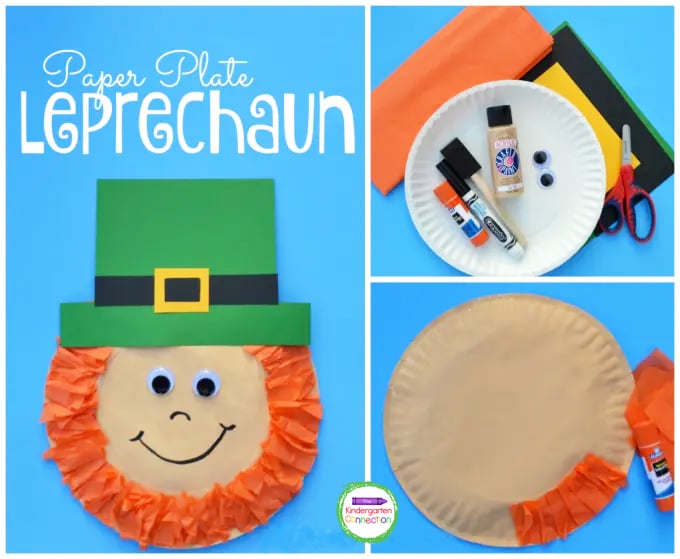
Do you celebrate St. Patrick’s Day with your kids or students? I don’t remember doing much for St. Patrick’s Day growing up, but that is being made up for now! My kids love to celebrate every holiday, big and small, with themed activities, crafts, and decor! We are getting an early start on our St. Patrick’s Day celebrations with this fun and easy Paper Plate Leprechaun Craft!
*Pair with our St. Patrick’s Day Centers and Activities for Pre-K & Kindergarten!
For this festive Paper Plate Leprechaun Craft, We are combining two of our favorite crafting items, paper plates and tissue paper! We used both of these items to create our Tissue Paper Heart for Valentine’s Day just a few weeks ago. They are inexpensive, readily available, and easy for young kids to use. Let’s grab what we need and get started!
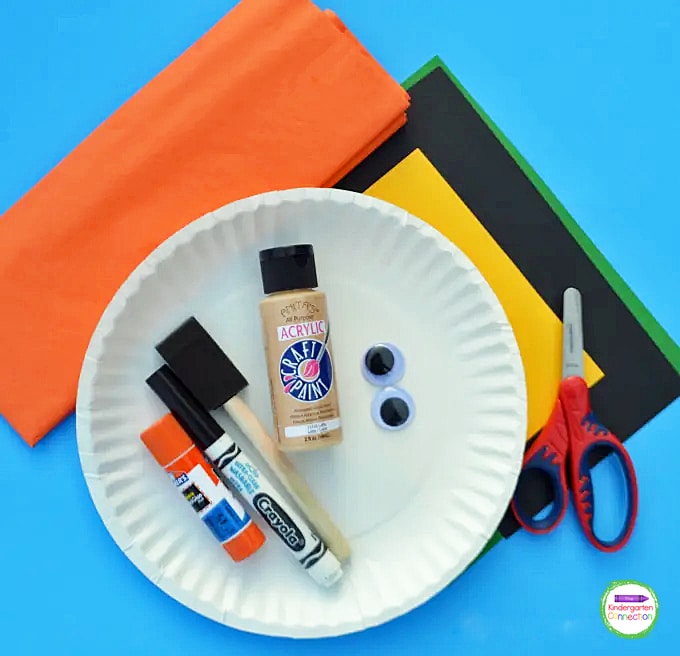
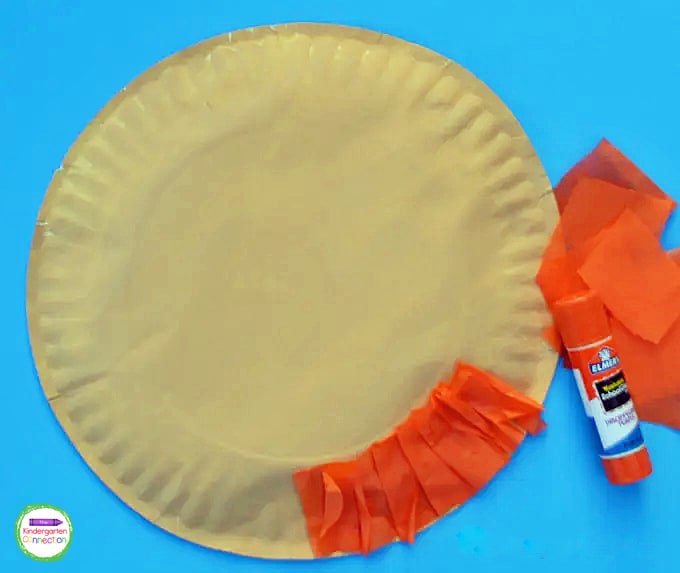
1. Begin by flipping the paper plate over and applying a light coat of paint to the backside of the plate to make the leprechaun’s face. Allow to dry. Ours dried within a few minutes!
2. Tear or cut the tissue paper into small pieces. (As a bonus, this is great fine motor skills practice!) We did not measure ours which meant every piece was slightly different in size, but you want it to be about the length of the outside rim of the plate. Our pieces were approximately 2″ squares. Again, this does not have to be exact. The randomness of the pieces make this craft that much more fun!
3. Apply glue to the outside rim of the paper plate, working in small sections. Fold the tissue paper slightly and apply to the glue. You want it to look almost like a small accordion fold. Continue to apply the tissue paper around the rim of the paper plate covering about 3/4 of the outside rim to create the leprechaun’s beard.
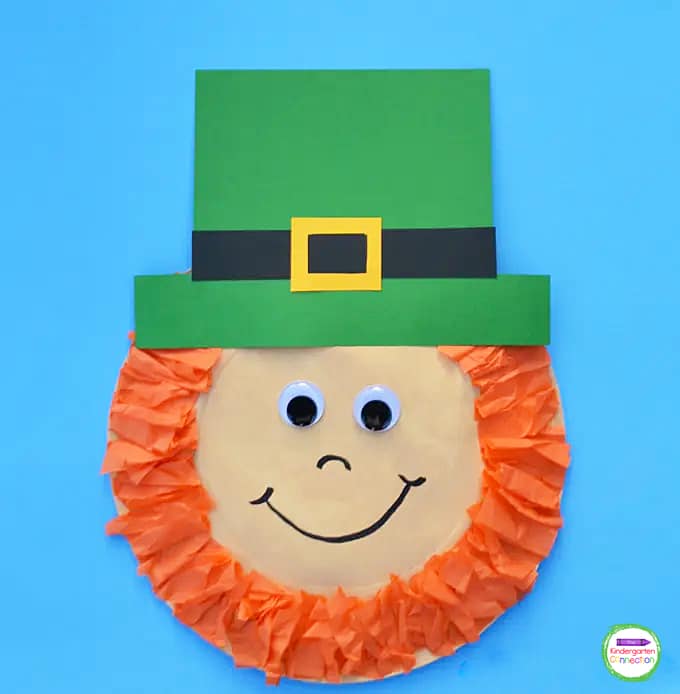
4. Using the template provided, trace and cut out the leprechaun’s hat with green construction paper. Then use a black piece of paper for the belt and yellow for the buckle. After gluing all of the pieces together, glue the hat to the top of the leprechaun’s head (where you have not applied tissue paper).
5. Glue the googly eyes to the plate and use the black marker to draw the nose and mouth.
One of my favorite things about this craft is that each child’s comes out so different! While there are instructions, it is fun to also just give your kids the supplies and see how they create their own unique paper plate leprechaun!
Ready for some St. Patrick’s Day fun? Grab the free leprechaun hat template by clicking the large, yellow download button at the end of the post!
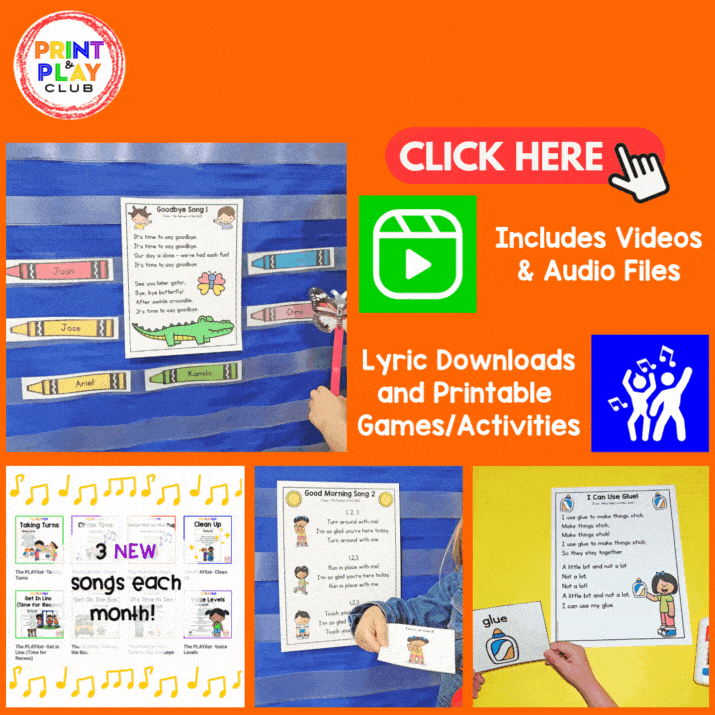
Your planning will be so much easier with instant access to:
Be sure to request an invitation so that you don’t miss your chance to be part of the best early childhood club around!


5 Responses
Thanks for this. I work in a care home and I think this will be fun and easy for my residents to make.
We are so happy to hear that you found our activities! We hope your residents enjoy the craft! 🙂
I love this cute craft!
Thanks, Demarcus! Have fun!
He looks like such a happy leprechaun!